The purpose of secondary mirror alignment is to ensure the secondary is directly below the focuser and is aligned to and reflecting light from the whole of the primary mirror.
This guide is part of a wider full mirror alignment and collimation guide. If you haven’t already, guides for removing the mirrors, cleaning and centre spotting your primary mirror are also available.
This guide is written for the Celestron AstroMaster 130EQ, but the same principals apply to all reflector telescopes.
Secondary mirror alignment guide
Time needed: 40 minutes
Aligning the secondary mirror is the most time-consuming part of carrying out full collimation and should only need to be checked if you are experiencing poor image quality, a knock to your scope or on a 12-18 month basis.
- Measure and adjust vanes so that secondary mirror is perfectly central
Note: the Celestron Astromaster 130EQ does not have vanes that can be adjusted (skip this step)
If following this guide for another telescope you should identify the adjustment fixings and measure the central location across each opposite pair of vanes. Loosen one side and tighten the other to slowly move the secondary mirror assembly into the centre. - Replace the eyepiece with a collimation cap
The purpose of the collimation cap is to ensure that your eye is central to the tube when observing during the subsequent steps. You can proceed without a collimation cap, but it is difficult to keep your eye exactly central to the focus tube and much of these initial steps are subjective based on your view.
You can make a DIY collimation cap.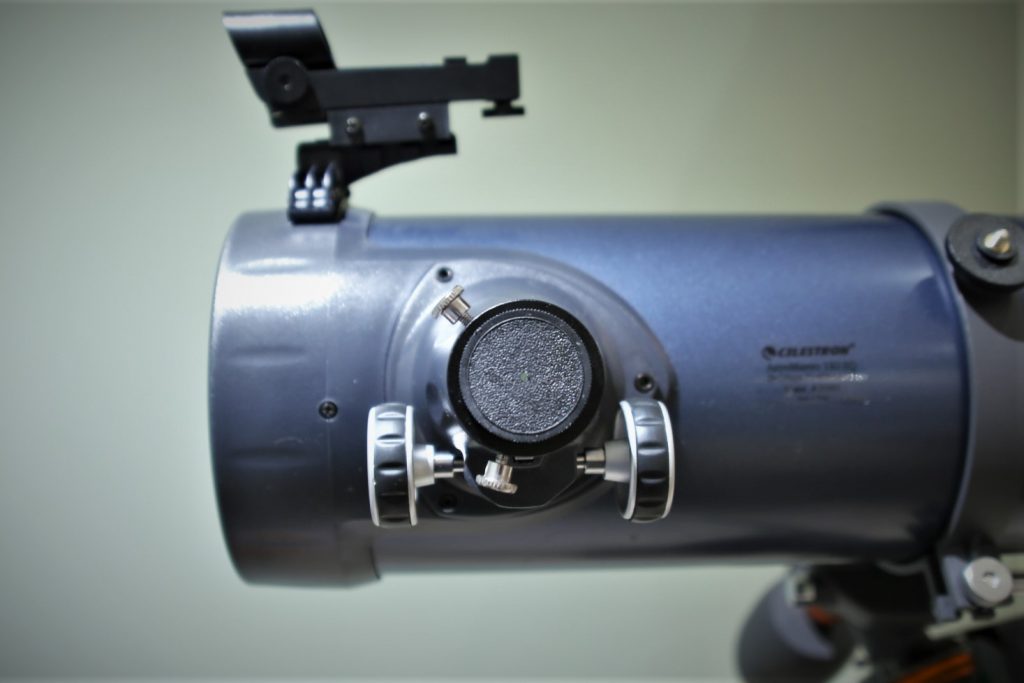
- Place differently coloured paper behind and below the secondary mirror
Place paper/card of one colour down the tube between the secondary mirror and the primary (so that this is reflected by the secondary mirror as you look through the focus tube).
Place paper/card of a different colour into the tube positioned against the side of the tube directly behind the secondary mirror (as seen from the focus tube).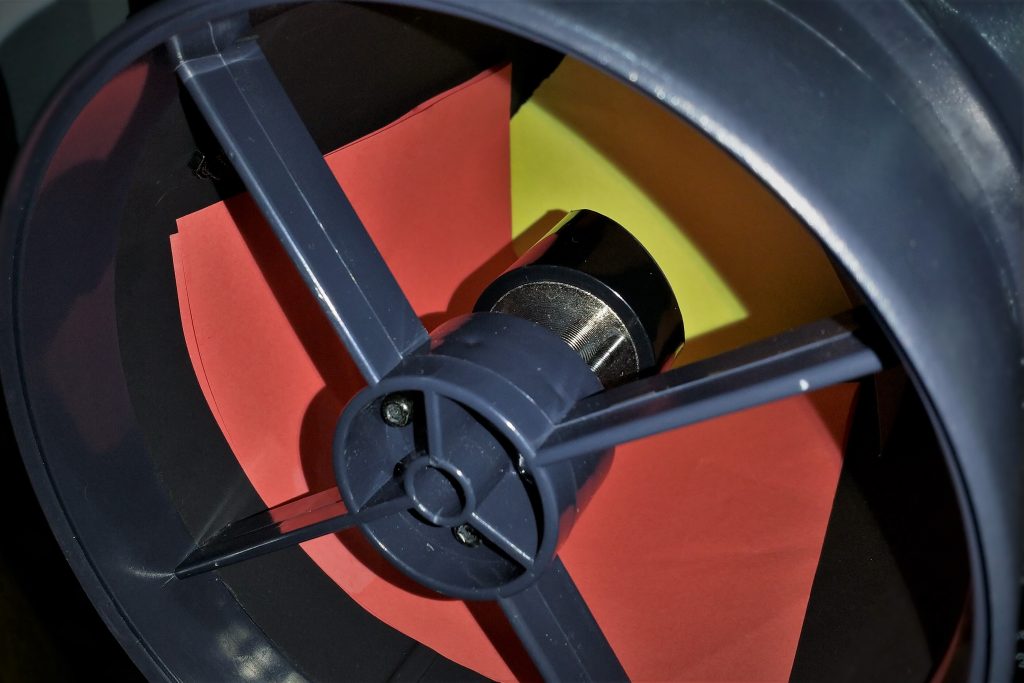
When you look into the focuser you should see something like the image below – the yellow paper is reflected by the secondary while the red paper is seen behind the secondary mirror assembly. The contrasting colour allows you to quickly identify the secondary mirror and the larger secondary mirror assembly. This allows you to concentrate on the position and shape of the mirror relative to the focus tube. You can illuminate the tube with a light to help give you a clear view.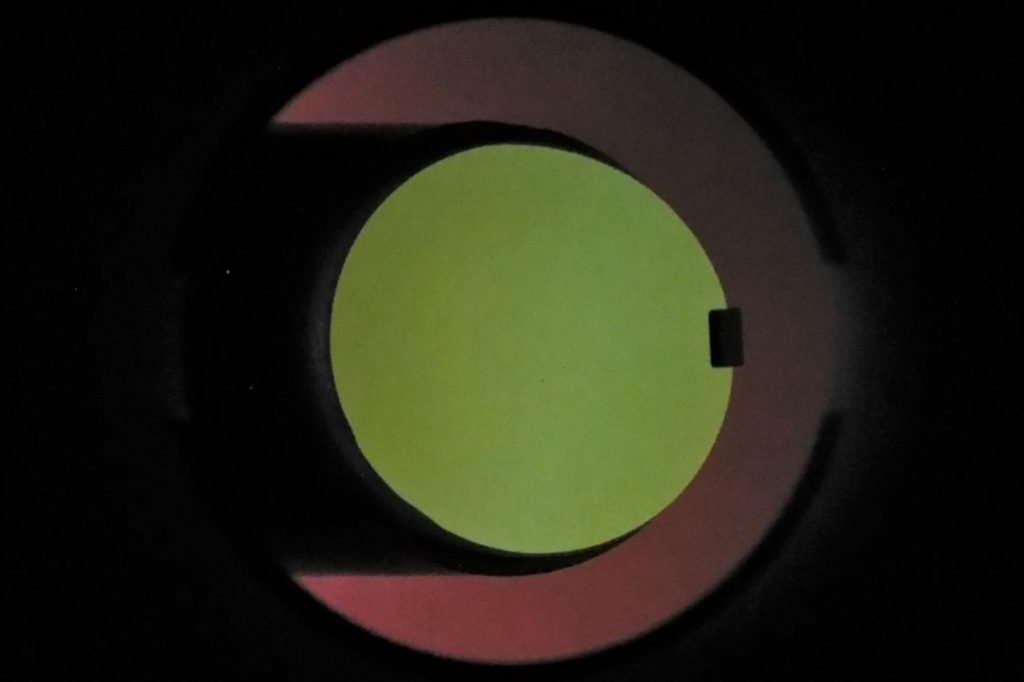
- Adjust height of secondary/distance from primary
First, we’re going to move the secondary towards or away from the primary mirror until it is perfectly central to the centre of the focus tube.
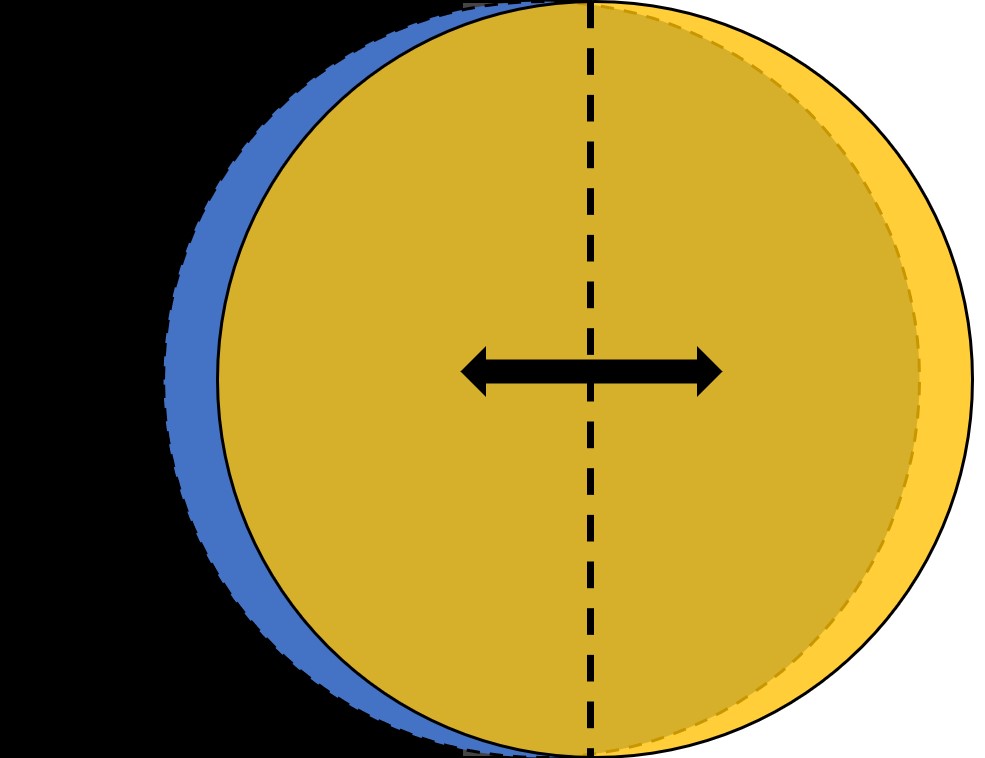
Concentrate only on the position of the secondary mirror (yellow circle in photos) in relation to centre of the focus tube.
Support the secondary assembly by holding the rear of the secondary mirror assembly wedge with one hand.
Using the central screw of the secondary mirror assembly adjustments (at the centre of the vanes) either tighten the screw to move the secondary away from the primary (moving it left in photo above) or loosen the screw to move the secondary down towards the primary (moving it right in the photo above). You will also need to loosen the allen bolts if you need to move the secondary mirror up/away from the primary.
Move the secondary mirror assembly until you are comfortable that it is exactly central to your eye, then lightly tighten the allen bolts just enough to hold the assembly still. - Rotate secondary assembly until mirror appears perfectly circular
Next, once the centre of the mirror is central to your eye, we will rotate and tilt the secondary mirror.
Slacken the central screw very slightly to allow you to gently rotate the mirror, as illustrated below.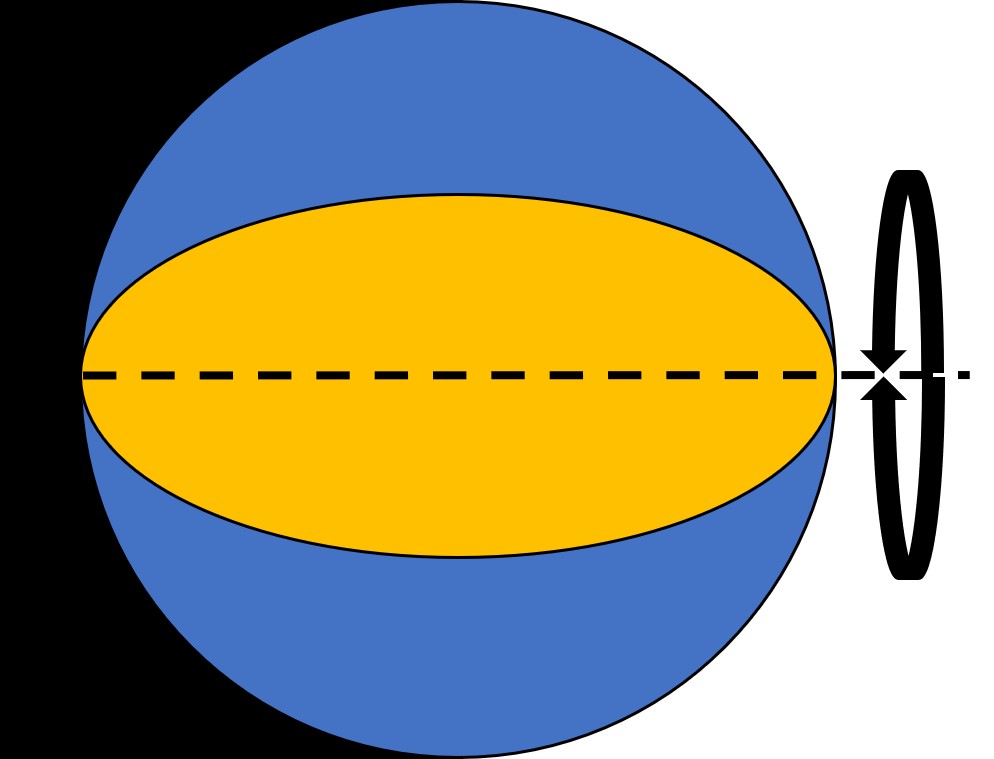
Concentrating only on the shape of the mirror rotate it until the secondary mirror (yellow) appears as round as possible, then re-tighten the central screw gently. As you rotate the mirror you will notice it will change between oval and circular – at this most circular point it is facing you and reflecting from the bottom of the tube at its’ best. - Tilt secondary mirror assembly so that assembly is straight and mirror circular
Still concentrating only on the shape of the mirror adjust the tilt of the mirror by loosening one of the three allen key bolts before gently tightening the other two bolts.
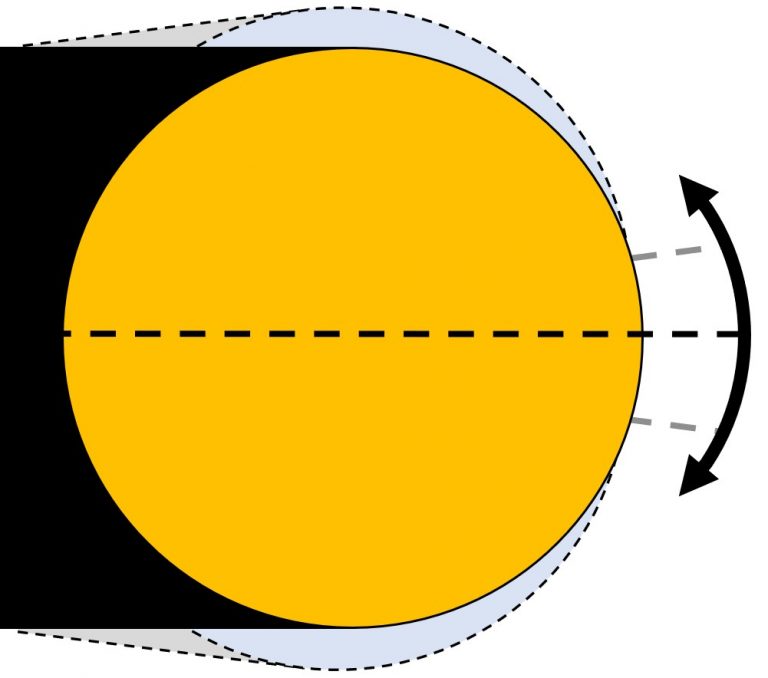
You need to find the point where the secondary mirror appears like a perfect circle in the centre of the focus tube and the assembly is not tilted excessively up/down or back/forward – i.e. the mirror (yellow) appears as a perfect circle and the mirror assembly/wedge (black in photo) appears straight.
You also need to look down the tube to check the assembly is not tilted excessively back/forward from the focus tube – a small hand mirror can be helpful for this. - Align secondary mirror to the primary mirror
Remove the pieces of coloured paper/card in order to check the secondary is aligned to the primary.
The illustration below shows the type of view you should now see looking through the collimation cap. It highlights the key features – working from the outside to centre of the images: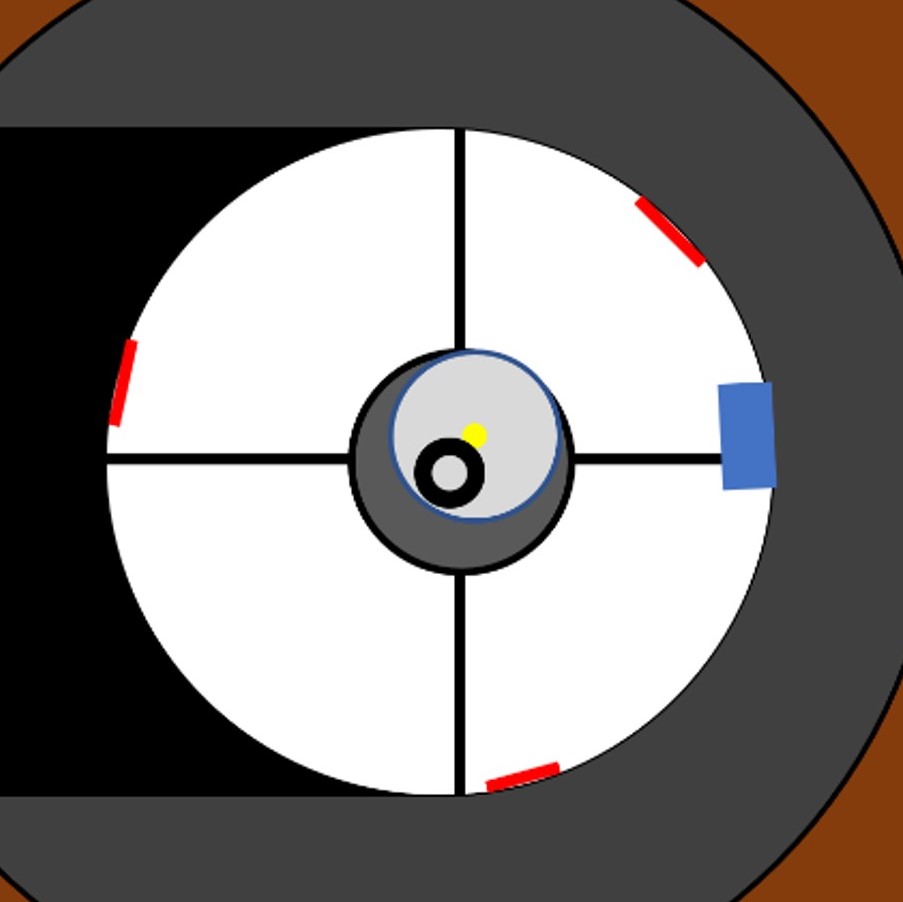
Brown – inside of focus tube as you look down it.
Dark grey – the optical tube behind secondary mirror.
White circle, blue & black – secondary mirror assembly. White circle is the reflection of the primary mirror on the secondary mirror. Blue rectangle is the clip securing the mirror to the secondary mirror assembly (black).
Red – the three primary mirror clips.
Central dark grey circle with four black lines – this is the secondary mirror reflected in the primary. The four black lines are the vanes that hold the secondary mirror assembly in the centre of the tube.
Light grey circle and yellow dot – rear of the collimation cap and hole you are observing from (if you have no cap you will see your eye here).
Black ring/donut – the centre spot on the primary mirror.
Looking centrally into the focus tube you should see the primary mirror and the three primary mirror clips all reflected in the secondary – your view will be something similar to the first picture below.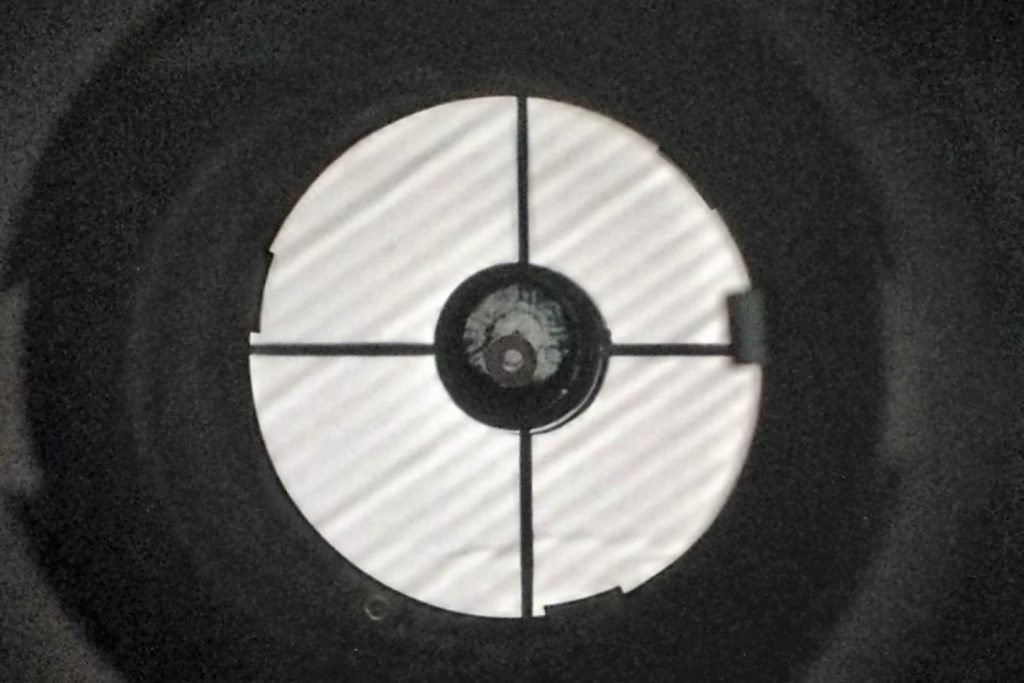
If you cannot see all three clips, highlighted in red in the illustration, you need to carefully adjust the secondary mirror assembly with the three allen/hex bolts.
Adjust the secondary slowly until you can see the primary mirror and the three primary mirror retaining clips all reflected clearly – as seen in the photo below.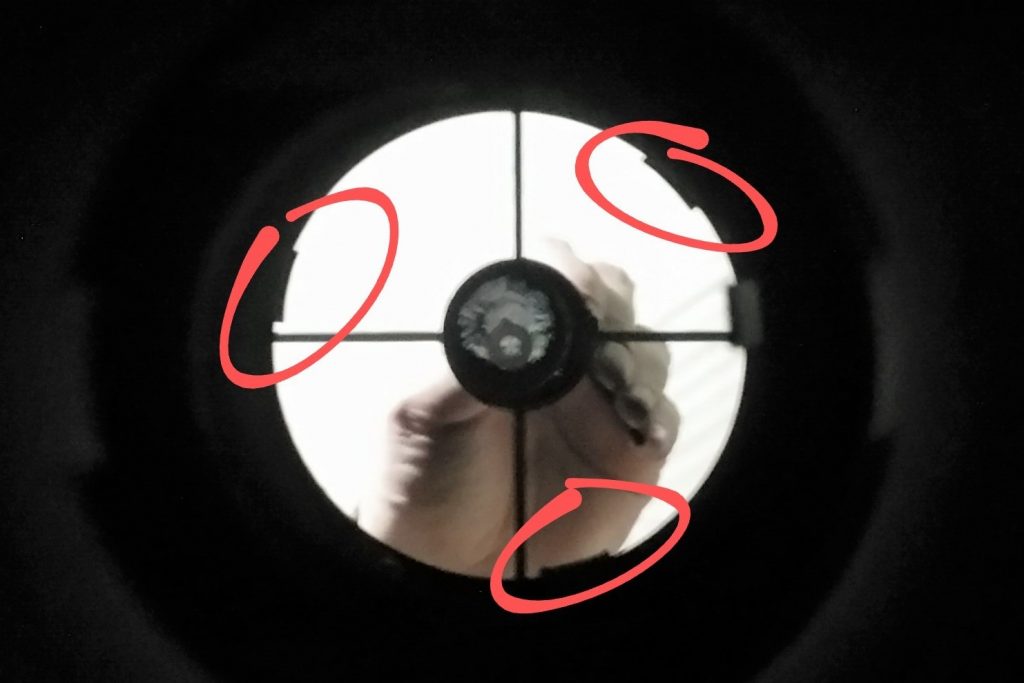
Next step
If you have a laser collimation tool, then follow the steps for collimating the primary mirror with a laser collimator.
If not, follow the steps for manually collimating the primary mirror.