DeSo: @StarGeezer
Twitter: @UKStarGeezer

Getting started with a telescope

Everyone wants to get straight out into the night sky to get started with their new telescope.

However, first nights with a telescope are often a series of mishaps and frustration.

This guide is dedicated to making those nights enjoyable and getting you started with a telescope. Also see my other guides for further topics such as mirror cleaning, collimation and polar alignment.

Why? I just want to get outside!

Trying to find a target without a calibrated finder scope is enough for most. Then, they discover how quickly the moon (or another object) actually moves. Next, they try to chase it across the sky… “which control is up/down and left/right again?”. “Wait, the image is inverted…” and it continues!

It often ends up in frustration, disappointment and the telescope gathering dust in a cupboard.

Prepare – so you can enjoy yourself

This absolute beginner’s guide will get you started and provides valuable tips on initial setup and techniques to learn.

This guide highlights important things to do before you even go outside as well as during your first stargazing sessions.

Unbox and assemble the scope first

First things first – find a working area with suitable space and assemble the scope. Follow the assembly instructions that come with your scope. Then follow the tips below to help while getting started with your new telscope.

Getting started with a telescope guide

The tips here will be relevant to anyone getting started with a new telescope. Some individual tips relate specifically to the Celestron Astromaster 130EQ or an equatorial mount.

Follow the tips below to prepare, practice and get started with your first stargazing sessions.

An unaligned finder scope is one of the most common issues for beginner’s getting started with a telescope. If it isn’t done, it can make viewing any target an almost impossible challenge.

In daylight, locate a chimney/wall/tree at least a couple of rows of houses away in the eyepiece. Practice focusing and get this perfectly central. Then, align the red dot to this target when viewing from the back of the telescope tube. You may need to move your head around until you find the sweet spot where you can see the red dot.

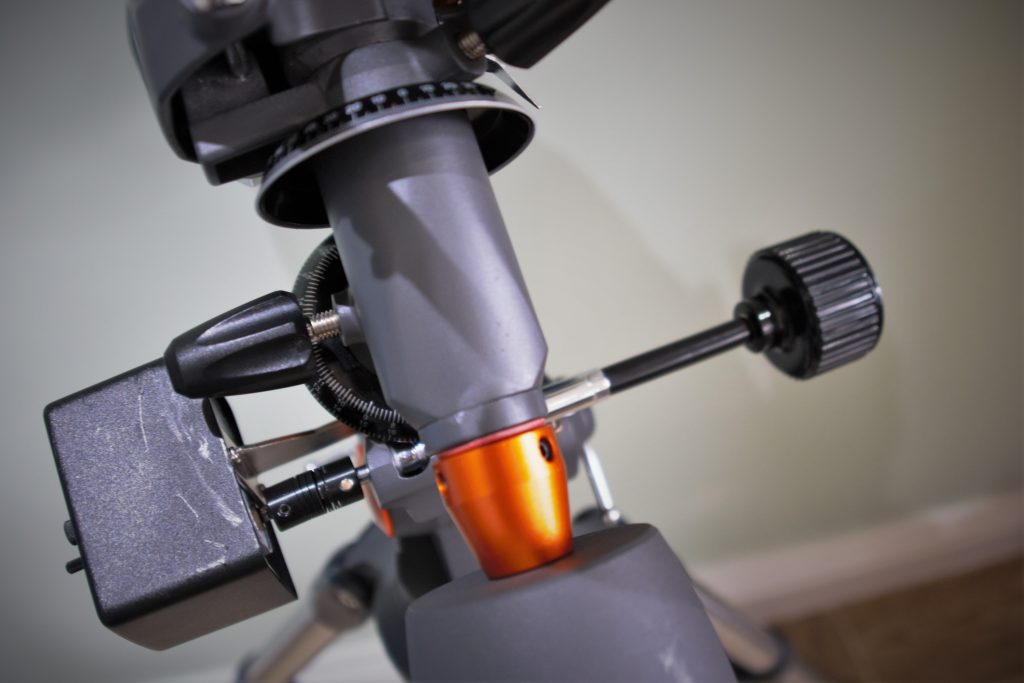
Be careful not to damage the thread on the declination slow motion control. The declination (DEC) axis control has a limited number of turns. Inspect the mechanism in good light so that you understand the limit of travel. You will occasionally need to unlock the axis and wind back the control.

Declination axis slow motion control and mechanism with limited turns on the 130EQ/CG-3.
Image: holding the declination axis slow motion control, the large control knob closest to the telescope. The mechanism it is attached to is pushed away or towards the control and has limited turns.

When not using the telescope, store it with the tube facing down and both the eyepiece and tube caps on. This helps prevent dust getting in or settling on the primary mirror.

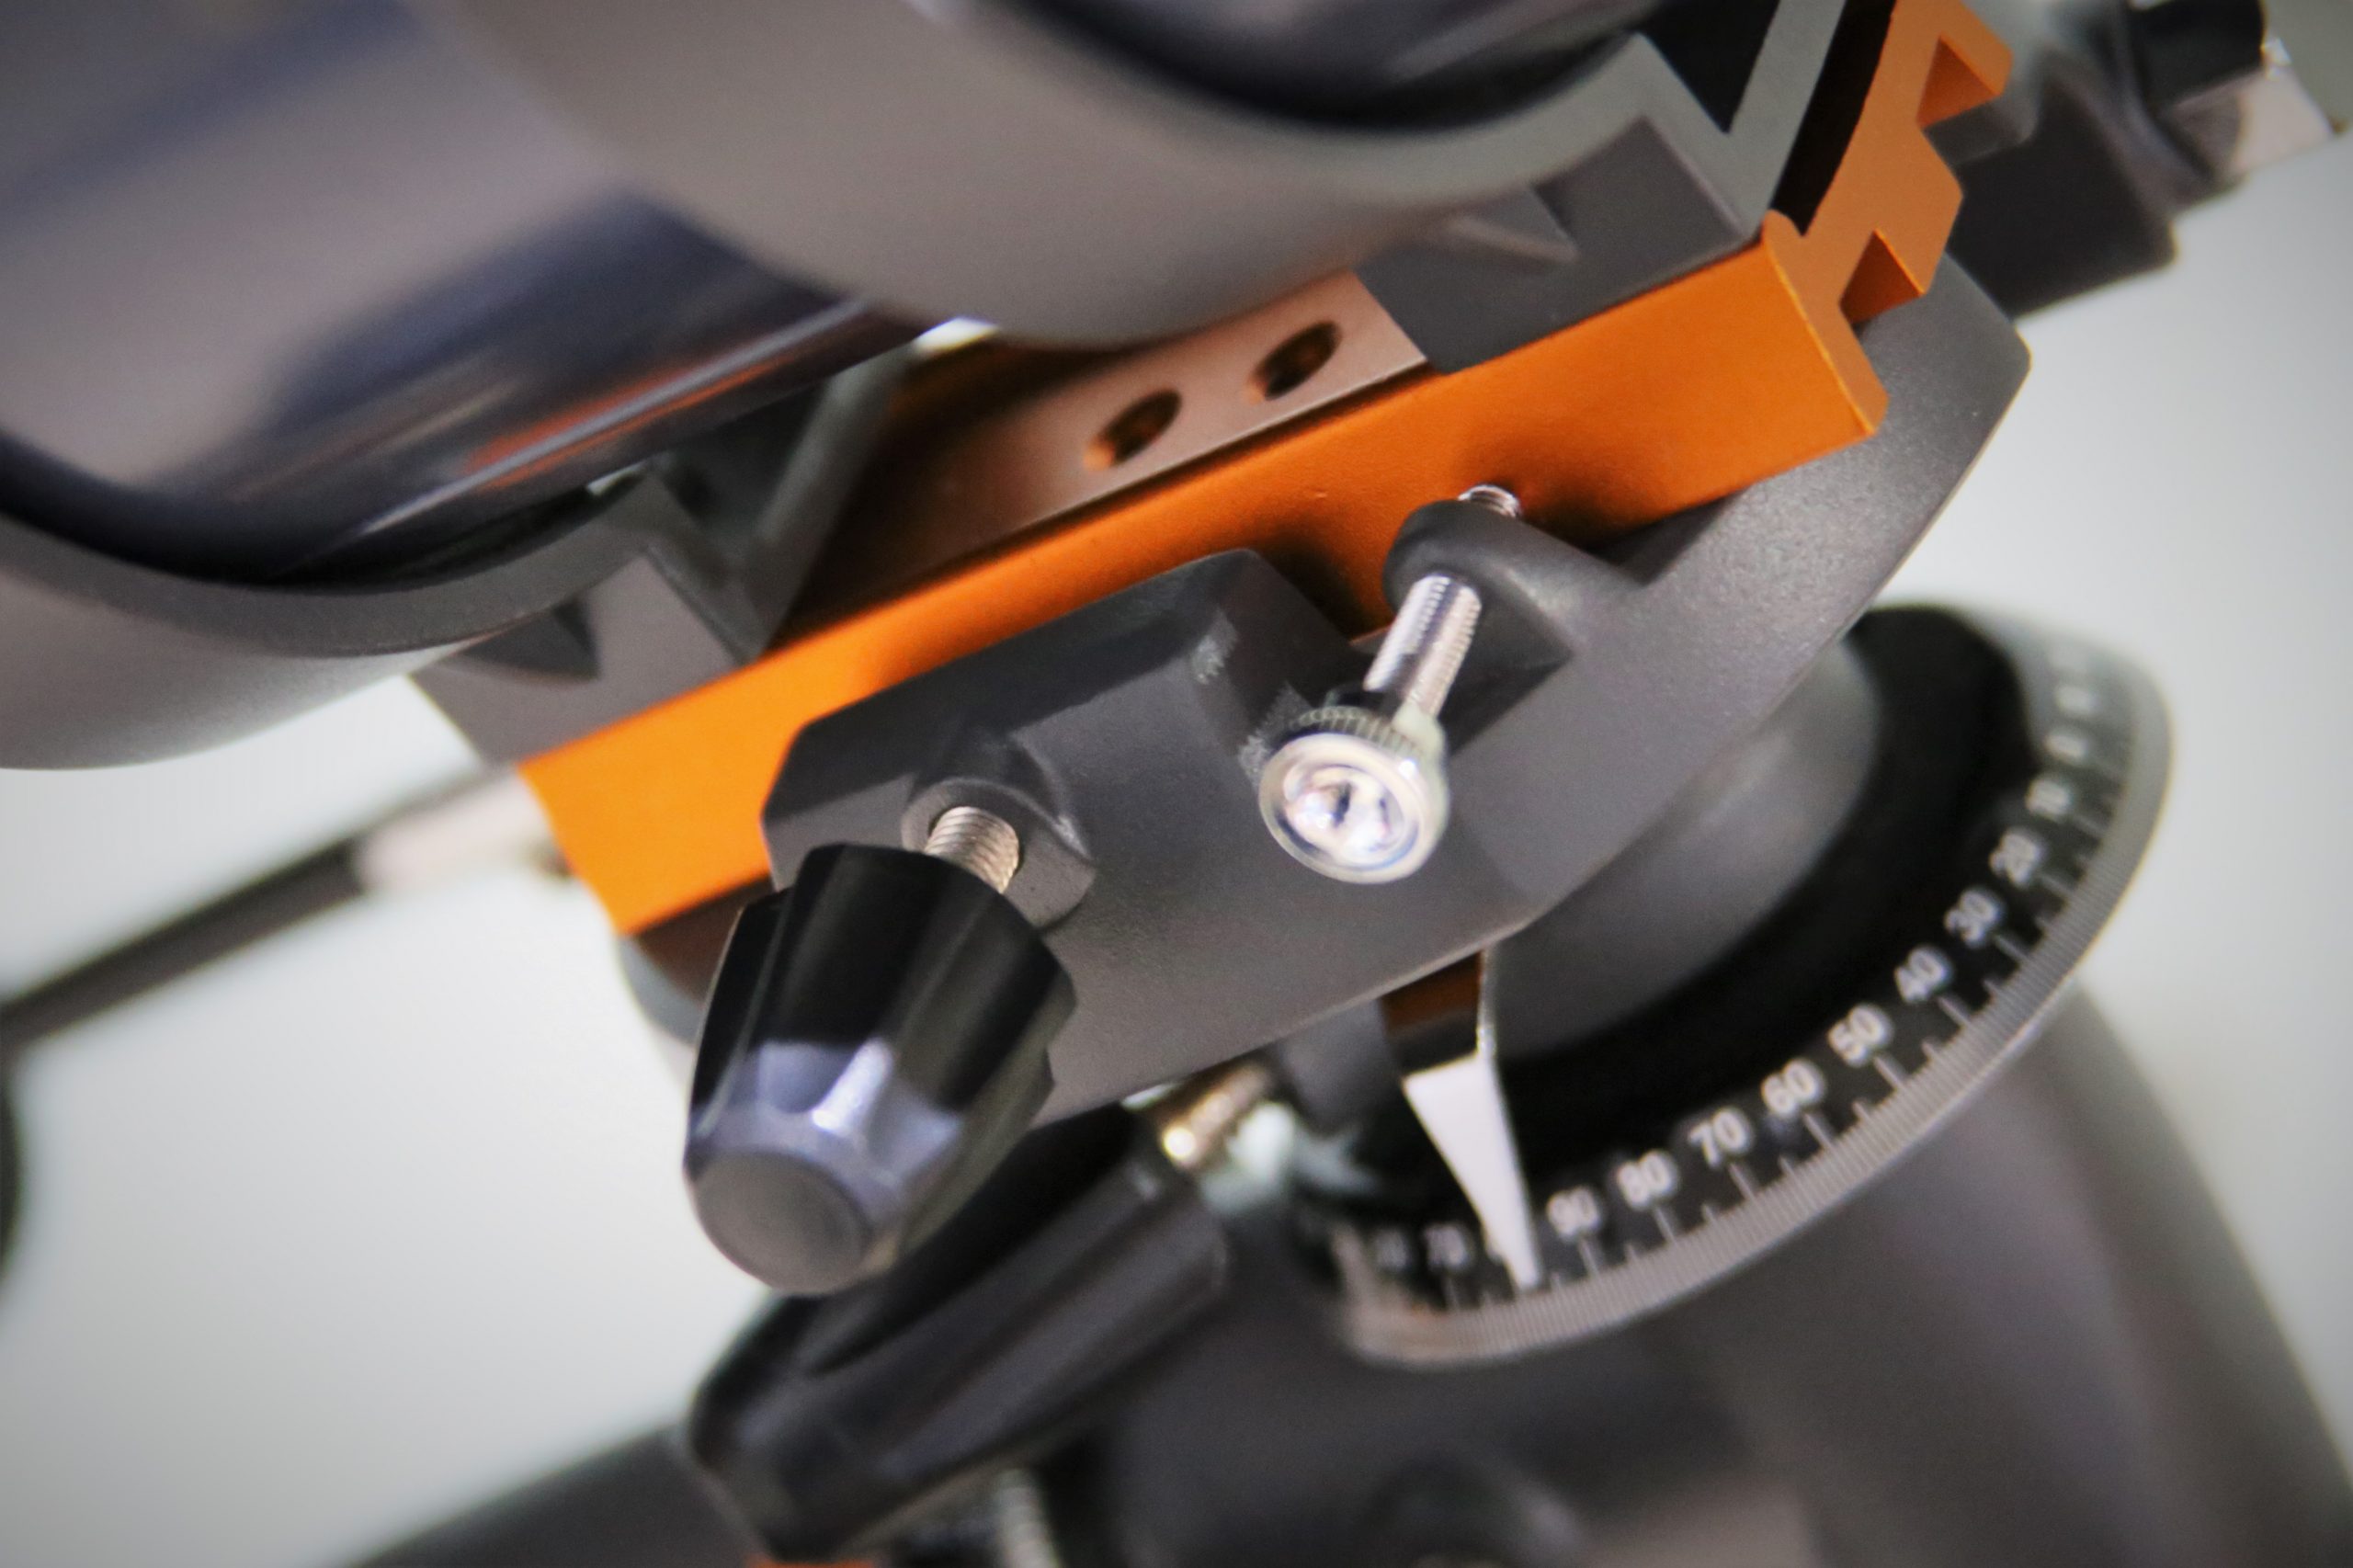
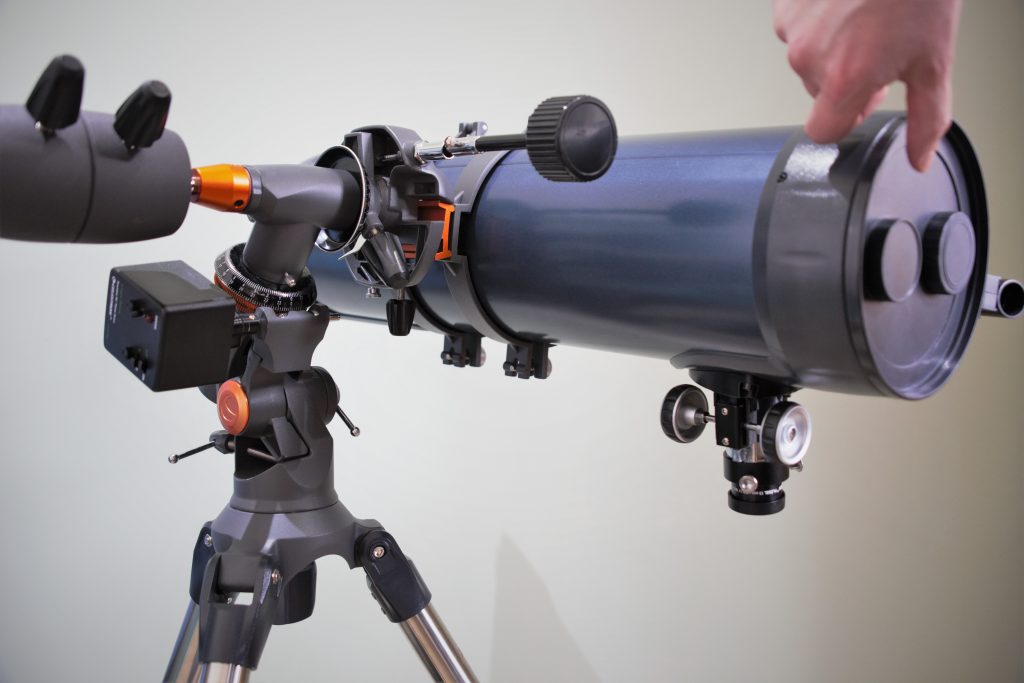
Check that the dovetail mounting screws that hold your telescope to the mount are fully tightened. It is easy to forget these and have the telescope slide or even fall from the mount when pointed high in the sky.

The dovetail is important as it holds the optical tube (the telescope part) to the stand.

Photo illustrating the dovetail and dovetail mounting screws.
Image: Dovetail mounting screws on the Celestron Astromaster 130EQ / CG-3 mount. In this photo the mounting screws are the large black and, smaller, silver thumbscrew knobs. These hold the orange dovetail to to the stand. The dovetail itself is secured to the telescope optical tube.

Without a solar filter, simply pointing the telescope at the sun could damage the telescope – the damage to your eyes would be devastating.

Never use the telescope on the sun without a full aperture proper solar film/filter in place – fitted across the open end of the tube. Filters threaded onto the eyepiece are not suitable.

No, really – when it’s dark you won’t be able to see!

Over time, muscle memory and practice will guide your hand to the right controls. But, while getting started with a telescope you’ll need to access all of these in the dark. So, spend some time with the scope – these tips should help you:

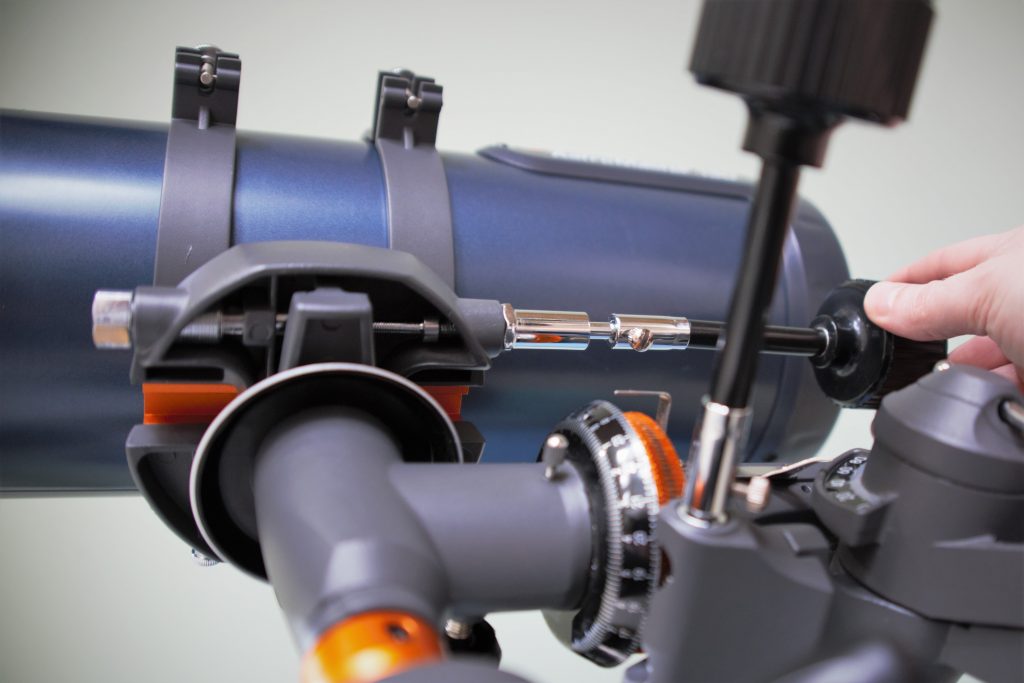
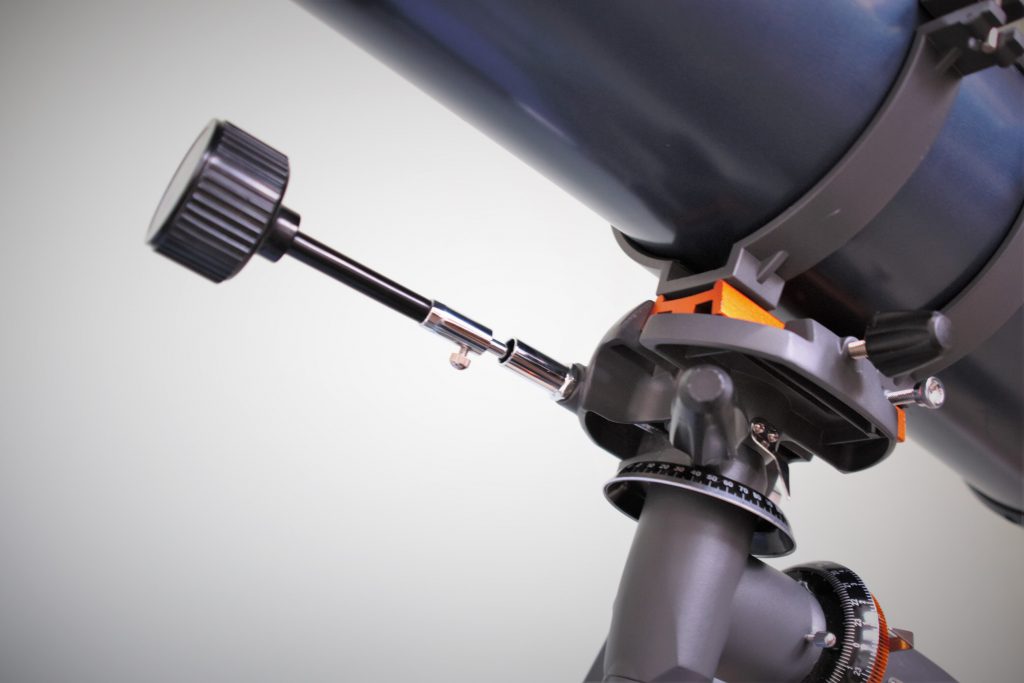
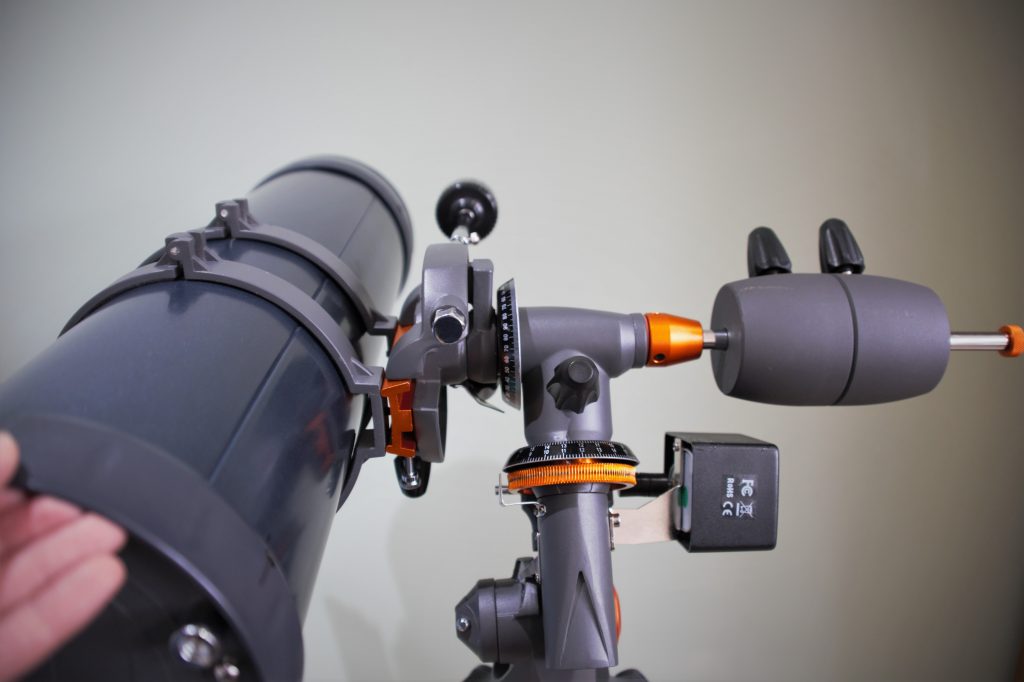
Identify the slow motion controls for the two different axis of movement. These are the Declination (DEC) axis and Right Ascension (RA) axis. Each has a large slow-motion control knob and a locking knob to hold the telescope still on that axis.

Keep hold of the telescope, but unlock the axes and move the scope with your hands. Slew it around, lock it down and then get a feel for the slow motion controls. Notice how the tube moves on each axis – an equatorial mount is not up/down and left/right.

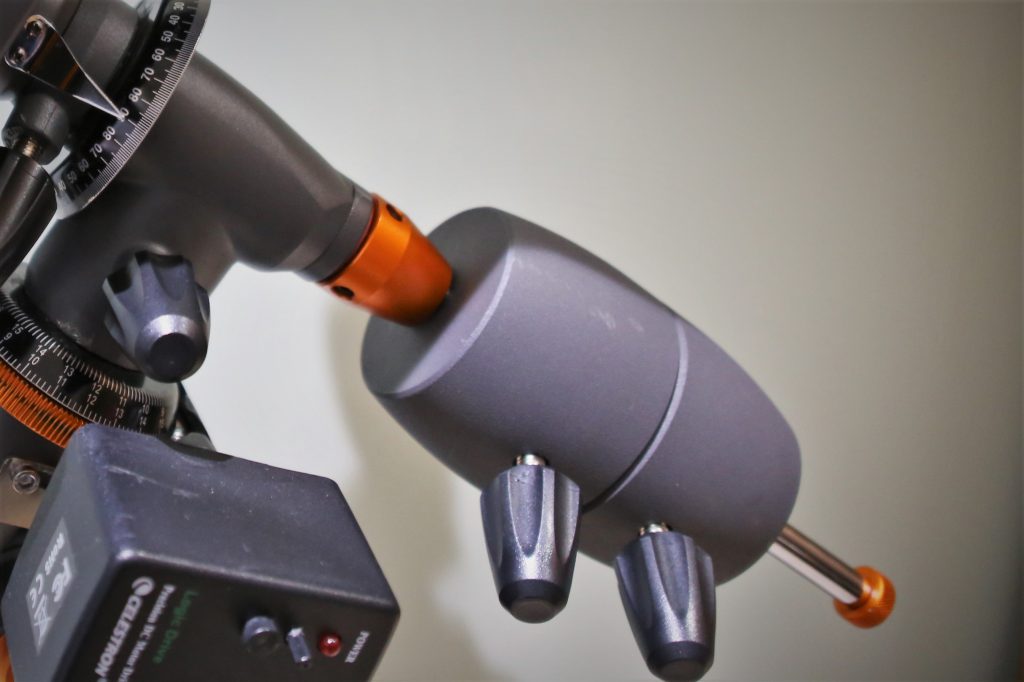
If you have a motor drive control fitted – like I do in the second photo below (bottom-left of photo) then you will not be able to use the slow motion control for the right ascension axis. I simply remove the control from mine to avoid it being an obstruction. Instead, you will need to unlock the axis and manually move it.

Photo showing the Declination (DEC) axis slow motion control and axis locking knob.
Image: showing the Declination (DEC) axis slow motion control and axis locking knob on the Celestron AstroMaster 130EQ / CG-3 mount.
Photo showing the right ascension (RA) axis lock (left) and slow motion control (right).
Image: showing the right ascension (RA) axis lock (left) and slow motion control (right) on the Celestron AstroMaster 130EQ/ CG-3 mount.

For reflector telescopes, the focuser (where you look) often becomes inaccessible or awkward to access as you point the telescope in different directions.

To correct this, slacken the tube-ring thumbscrews that hold the optical tube assembly (OTA) in place just enough that you can twist/rotate the tube within the rings that hold it in place.

You can leave these slightly loose. Just enough that you can rotate the focuser into a comfortable position, as and when needed.

Photograph highlighting the tube-rings thumbscrews and tube-rings on the 130EQ.
Image: showing the tube-rings holding the 130EQ optical tube in place. The silver thumbscrews can be loosened slightly to allow the tube to rotate or be moved forwards and back to help balance weight.

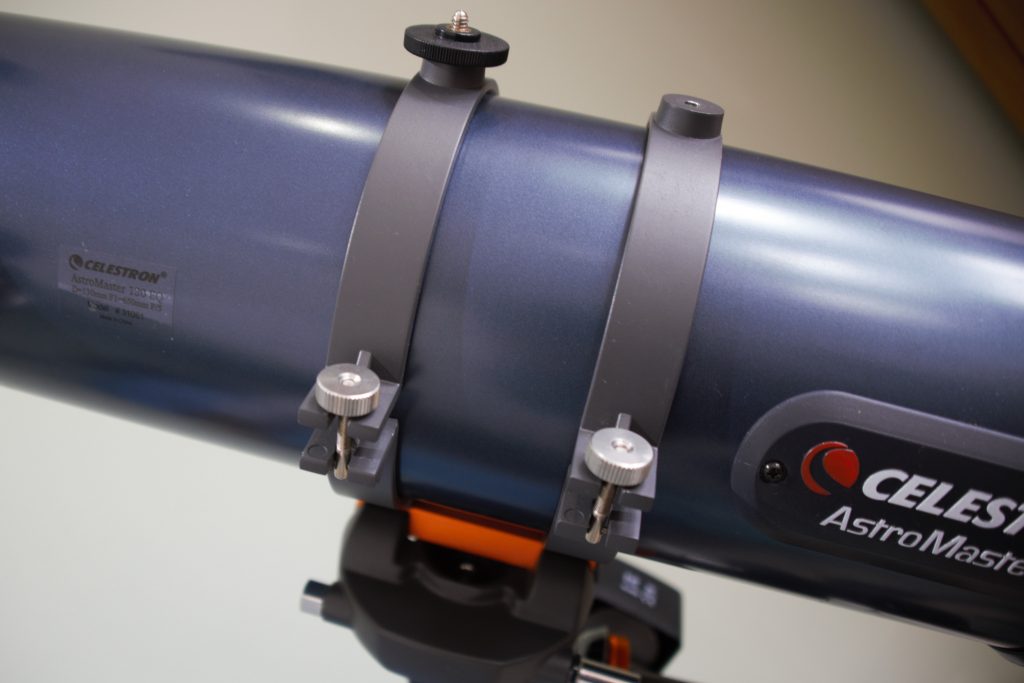
As well as for rotating the focuser, try moving the tube up and down as you rotate the tube within the tube rings.

While stargazing you may need to rebalance the weight of the scope occasionally – different areas of the sky, changing eyepieces or adding a camera, for example.

Sliding the tube within the tube rings allows you to make small weight adjustments while out beneath the stars.

It is important that the telescope is balanced and an important skill to learn while getting started with a telescope.

If incorrectly balanced it can easily move from a target, ruining your experience. It also causes excessive stress and wear on the mount mechanisms and will cause instability. In worst cases the telescope can drop, hit the tripod, or even fall over – causing damage.

Balance the right ascension (RA) axis first

Unlock the RA axis and move the telescope to one side – you need the telescope and counterweights to be horizontal – parallel to the ground. Ensure you hold the telescope securely and feel whether it is balanced or drops to one side. If the mount tries to rotate, unlock the counterweights and adjust them on the counterweight bar until the telescope feels balanced. Once balanced you should be able to let go of the telescope while the RA axis is unlocked.

Always try to position counterweight(s) at the top of the counterweight bar as close to the telescope as possible. Remove/add a counterweight to achieve this where possible.

Balancing the 130EQ/CG-3 mount on the RA axis
Image: balancing the 130EQ/CG-3 mount on the RA axis. The RA axis lock is in the centre of this photo.
Image: two counterweights positioned at the top of the metal counterweight bar on the Celestron 130EQ/CG-3 mount.

Once balanced and horizontal, lock the RA axis again.

Next, balance the declination (DEC) axis

Holding the telescope securely, unlock the declination axis and feel for balance again. With the tube horizontal feeling for weight determine if it tries to rotate. It should remain horizontal. If not, you need to shift the weight of the telescope forward or back on the stand.

Do this by moving the telescope forward/back either within the dovetail rings or slackening the dovetail mounting screws and moving the whole telescope and dovetail.

Once the weight is balanced and the telescope remains motionless with the DEC axis unlocked you are done. Ensure you re-secured the dovetail locking thumbscrews if you have moved the dovetail bar.

Balancing the 130EQ/CG-3 on the declination (DEC) axis
Image: balancing the 130/EQ-3 on the Declination (DEC) axis. In this image the DEC axis lock is positioned just to the left of the bright orange dovetail attached to the tube-rings.

As you become more comfortable with your telescope you will want to balance the scope as part of your setup. You will also want to do this when rotating the focuser for different targets and when adding heavy eyepieces or astrophotography equipment.

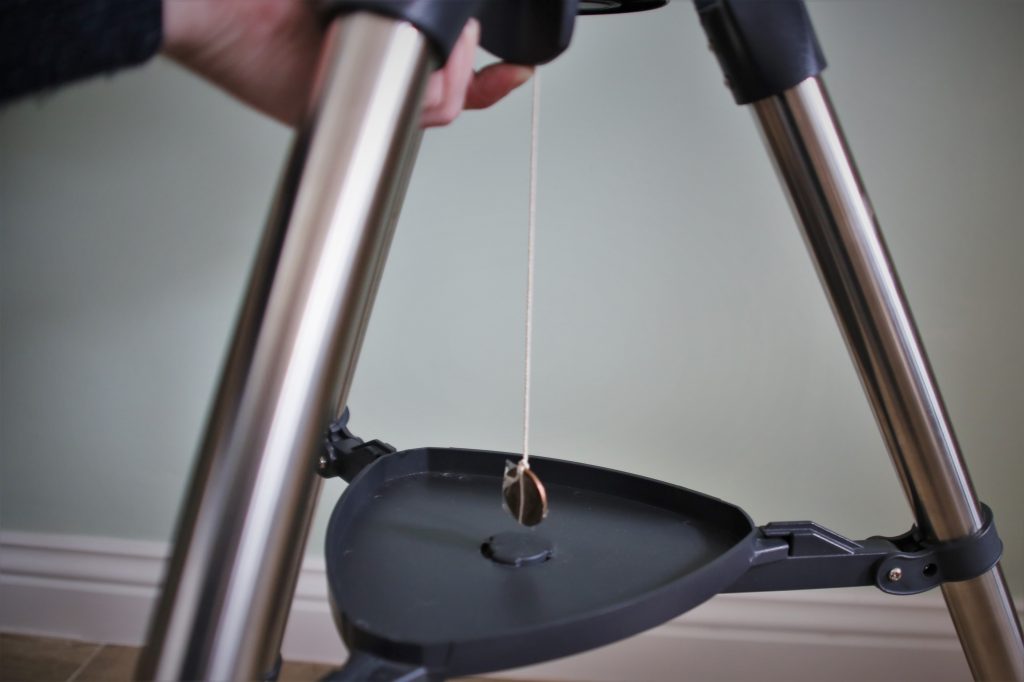
When you setup the telescope for a star gazing session you need to level the mount. This is to allow the equatorial mount to be aligned and do it’s job – making following astronomical targets easy.

Over time practice and learn how to do this as part of your setup and polar alignment routine.

You can use a spirit level on the accessory tray, a plumbers line (or weight on a string) dangled from the centre bolt beneath the tripod head or even a spirit-level phone app to check this.

For your first sessions – as long as the stand is roughly level – this will be more than enough to start enjoying some targets.

Using a plumbers line to level the mount
Image: using a makeshift plumbers line to level the mount. First ensure legs are spread evenly and the accessory tray clips are all aligned. Then adjust legs until the line hangs centrally in the tray.

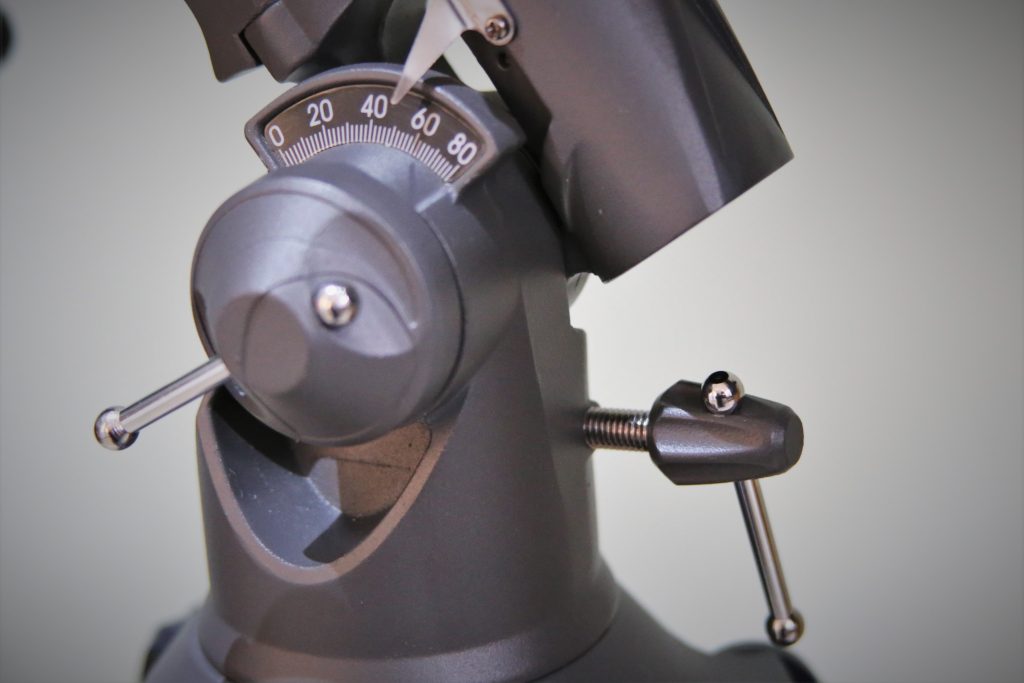
Before you go outside, set the latitude adjustment of the stand to match your current latitude.

First, unlock the latitude adjustment locking bolt. Then, turn the latitude adjustment until the dial matches your current latitude.

Location of latitude adjustment screw and locking bolt on the 130EQ
Image: shows the location of the latitude locking bolt, on the left – in front of the latitude dial. The latitude adjustment screw is on the right.

Practice carrying, setting up and levelling the stand in daylight so you get familiar with the controls and how to level the stand.

Depending upon the scope, the route to your site and your own abilities, you may wish to remove the optical tube from the mount for transportation/carrying. If you do remove the tube always check that the dovetail mounting screws are fully tightened on reassembly.

You’ll need to orientate the stand to the celestial pole – this is usually marked with an arrow on the mount head.

It’s easy to spend time setting up – only to discover you can’t see your target!

Before you go outside, take a little time to think about where you will setup the telescope. This will help avoid disappointment.

In the northern hemisphere, you’ll ideally want to setup where you can see the North Star, Polaris. This is so that you can carry out polar alignment to make tracking objects in the telescope easier. Those in the southern hemisphere will want to have a clear view of Sigma Octantis.

For your first sessions we’ll roughly orientate the stand, but over time you’ll want to learn more about polar alignment and find suitable stargazing site(s) you can use. For example, this might be two different spots of the garden for different areas of the sky.

You’ll want to pick a dark area away from street/garden lights. This is not always possible, but find the darkest spot you can.

Bare in mind any floodlights that may suddenly come on while you’re out with the telescope. A sudden bright light will destroy your night vision. It can also be quite painful when your eyes are adjusted to the dark.

Acclimatise your eyes and avoid glare

You will need to acclimatise your eyes to the dark in order to observe many targets. This can take time, but the more you star gaze and practice the better you will get.

Avoid looking towards street lights or your phone.

Feint targets would include the more elusive planets, comets and most deep sky objects such as nebulae and galaxies.

When considering potential setup locations do think about trees, large buildings and other objects that may obscure the sky.

Think about what surface you’ll be setting up on. It can have a dramatic effect on the stability of the stand and how easy it is to view targets in the eyepiece.

  • Grass/soil is a good foundation for the tripod and will cushion vibrations and shaking of the telescope.
  • Concrete is solid and stable.
  • Wooden decking can be unstable and cause excessive vibrations in the telescope from the movement of your feet or shifting of your weight as you move.

Shelter from the wind if you can. Even a light breeze has a dramatic effect on the stability of the stand.

While choosing potential sites, use a planetarium app on your computer or mobile phone. Set your location and take a look at what you can see from your chosen location. Most phone apps use the phone’s accelerometers – meaning you just point the phone to the sky and see what objects are there.

Set the time in the app to when you expect to be stargazing and take a look from where you plan to setup. This will help you determine whether you have line of sight for Polaris/Sigma Octantis and any objects you’d like to look at. If you have no targets in mind it’ll show you what will be visible.

While using the app advance the time forward and watch the position of the stars and planets move. This will help you understand how the stars move above our heads – and why an equatorial mount is about rotation – rather than up and down and left and right.

Look the target up online or in a planetarium app. Find out how bright it is, where it is, how big it is and how to find it. This will give you an idea of how difficult the target will be and what eyepiece(s) would be appropriate.

You can check the field of view (FOV) for your telescope, eyepieces and targets using a FOV calculator. Astronomy.tools provides a handy free FOV calculator which is very handy while getting started with a telescope.

You’ll want to get setup and star gazing as quickly as possible, but do read up about fully polar aligning your telescope during cloudy evenings or the daytime. Look to incorporate it into your setup as you learn.

Instead, here’s a very quick, rough, polar alignment to get you started on your first nights:

Setup the telescope with the arrow on the mount pointing head towards North and level the stand. If you have already set your current location’s latitude on the mount’s latitude adjustment this will be sufficient for your first stargazing sessions.

In time, full polar alignment will allow you to track a target with only the RA slow motion control – or a motor drive if you have one fitted.

Start with an easy target like the moon and try targeting, focusing on and tracking it:

Start with an eyepiece with low magnification, e.g. 20mm eyepiece – commonly included with many telescopes.

Unlock and manually target

Unlock the DEC and RA axis and move the scope with your hands towards the chosen target. If you have balanced the telescope you’ll find that the telescope should stay roughly where you point it.

Look through the finder scope keeping your head at the back of the telescope tube. Move your eyes up and down and left and right until the red dot appears within the finder scope viewfinder. With practice you’ll quickly find this “sweet spot”. Slowly move the telescope until the red dot appears over the chosen target.

Lock both axes and take a look through the eyepiece – adjusting the focus until you get a clear view. You may need to adjust the declination (DEC) or right ascension (RA) controls slightly or unlock for more manual adjustments.

Follow the target

You’ll find that the target quickly moves from your view – it’s surprising how quickly the night sky moves. If you followed the advice above, you should be able to follow the target quite easily. Simply turn the right ascension (RA) slow motion control.

If you have a motor drive fitted

If you have a motor drive on the RA axis you will not be able to turn the RA slow motion control. Instead, turn this on and vary the speed to follow the target automatically. If the telescope appears to move away from the target even quicker, check the hemisphere is set correctly (North or South). A large number of drives have this marked in reverse – so do switch the setting if you are experiencing difficulties.

Experiment with higher power eyepieces

Once you’re comfortable following the target and controlling the mount, step up to a more powerful eyepiece to increase the magnification.

If you have a barlow lense you can put your eyepiece into this to increase magnification further.

As the magnification increases the image will become dimmer and the target will appear to move more quickly – making tracking and targeting more challenging. Always start with a low power eyepiece.

Both the size and brightness of a target will affect the type of eyepiece that will be suitable.

Always start with a low power eyepiece and gradually step up the magnification. The higher the magnification the faster objects will appear to move – and the harder they are to target.

Quick eyepiece summary

  • Low power (high mm) eyepieces will give lower magnification, brighter views. Targets will appear to move more slowly and will be easier to track.
  • High power (low mm) eyepieces will give greater magnification, but dimmer views. Targets will appear to move more quickly and will be harder to track (without guiding or a motor drive).

Check the field of view

You can check the field of view (FOV) for your telescope, eyepieces and targets using a FOV calculator. Astronomy.tools provides a handy free FOV calculator which is very handy while getting started with a telescope.

This can be difficult to align in the dark, but is possible. You can use a low power eyepiece and a clear, easy, target like the Moon or a illuminated house/building/object (at least a couple of rows of houses away).

Manually point the scope towards this object. Then, looking through the eyepiece, try to locate it centrally in the eyepiece and lock the axes. Once you have located the object centrally, adjust the finder scope until it’s red dot/target is aligned to the same object. Check the eyepiece and move/tweak until you are confident the finder scope is aligned.

If you are getting stuck or have any questions, be sure to check out my troubleshooting and frequently asked questions page.

Also, look for a local astronomy society, groups and likeminded astronomers on social media. The online astronomy community is absolutely fantastic – genuinely welcoming and most are very happy to help beginners.


What next?

Hopefully you’re getting started with your telescope nicely. Take a look at my frequently asked questions section if you experience any difficulties.

Please take a look at my other beginner’s astronomy guides, follow my journey or join me on twitter.