A laser collimation tool makes collimation very quick and simple to perform.
This guide takes you through how to perform primary mirror collimation with a laser collimator.
If you have not followed the full collimation guide from the start, do check that your secondary mirror is aligned – as issues with the secondary are not highlighted by the laser collimation method. Issues are rare, but a misaligned secondary could reduce the light gathering power while still giving you a sharp image.
This guide is written for the Celestron AstroMaster 130EQ, but the same principals apply to all reflector telescopes.
Primary mirror laser collimation guide
Time needed: 10 minutes
Follow these simple steps to collimate the primary mirror using a laser collimation tool.
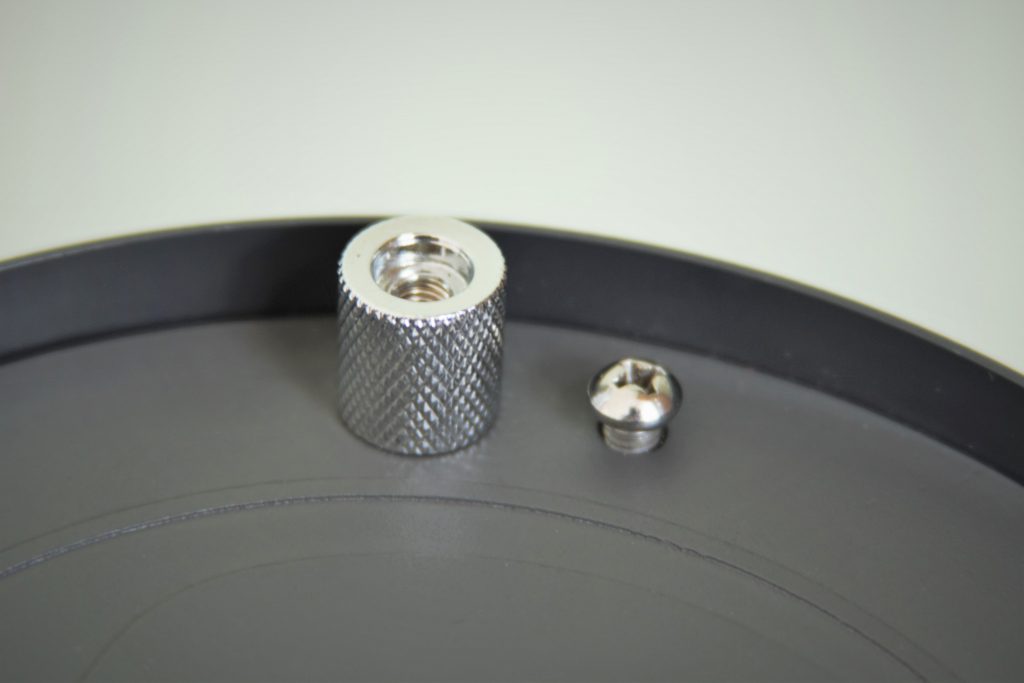
- Locate and slacken the primary collimation locking screws
Locate the primary mirror collimation locking screws – three silver, rounded, crosshead screws next to each collimation thumbscrew at the closed end of the optical tube. Slacken these very slightly – only a half a turn.

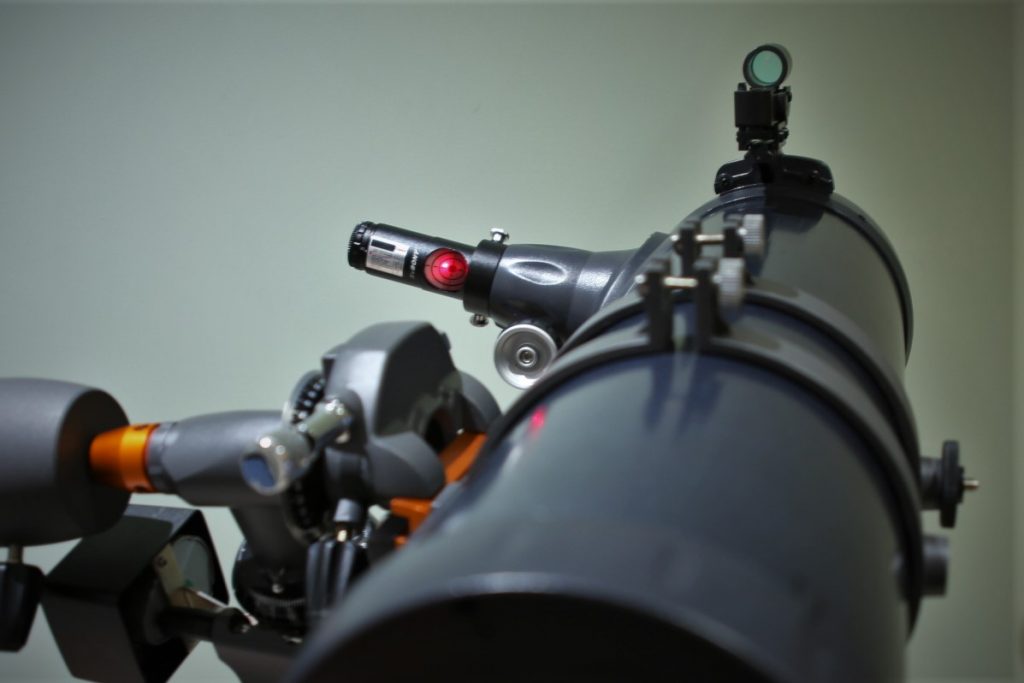
- Position laser collimation tool
Position laser collimation tool in the focuser so you can see the target while adjusting the primary mirror thumbscrews – ensure it sits squarely in the focus tube and secure it.
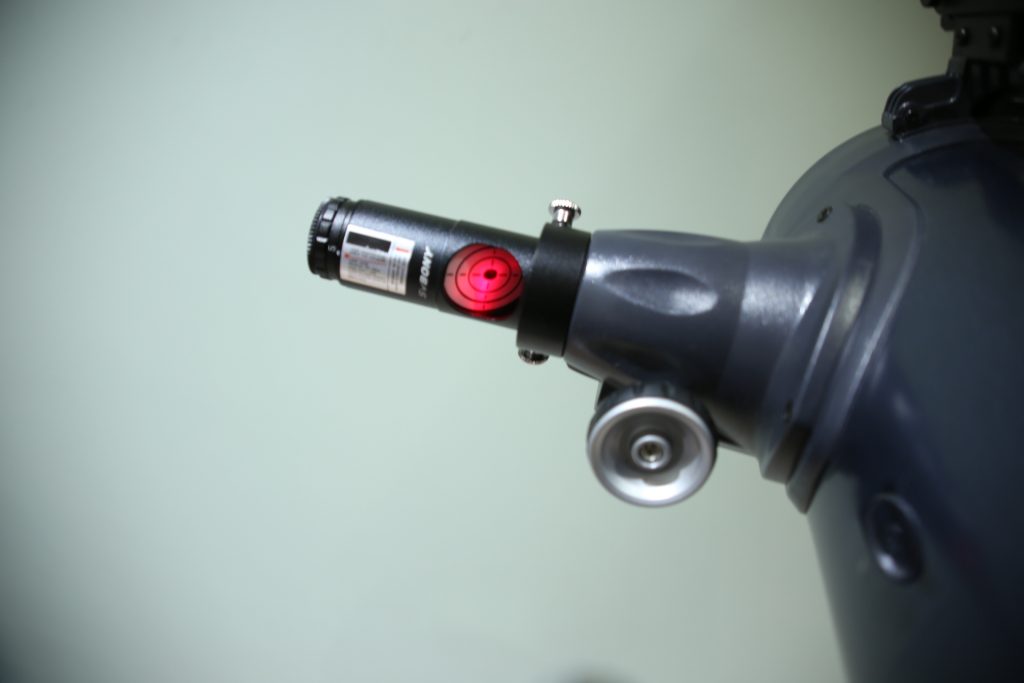
- Adjust secondary until laser hits centre of primary mirror
Turn the laser on and run a hand over the open end of the tube to ensure no direct beams are being reflected before you look down the tube.
Inspect where the laser hits the primary mirror. If this is not in the centre of the primary mirror centre spot tweak the three secondary mirror assembly allen/hex bolts until it is perfectly central.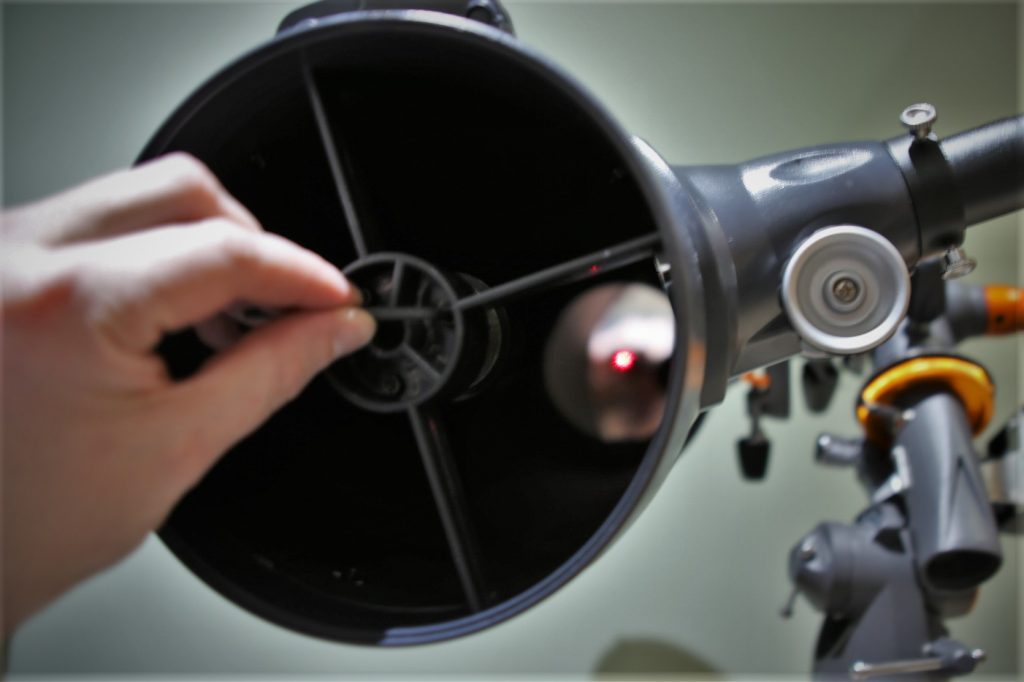
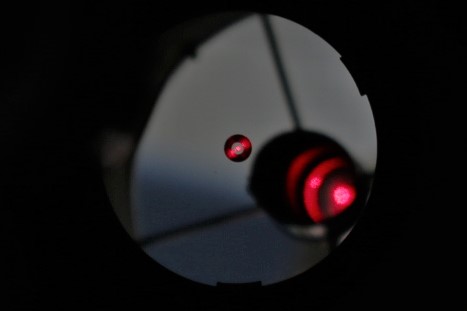
- Adjust collimation thumbscrews until laser is returned to the centre of the target
Next, look at the target on the collimation tool – if the returned beam is not central, adjust the primary mirror collimation thumbscrews. Adjust until the reflected laser beam disappears into the hole at the centre of the collimation tool target.
Do not overtighten or loosen the thumbscrews – they should remain finger tight throughout their travel.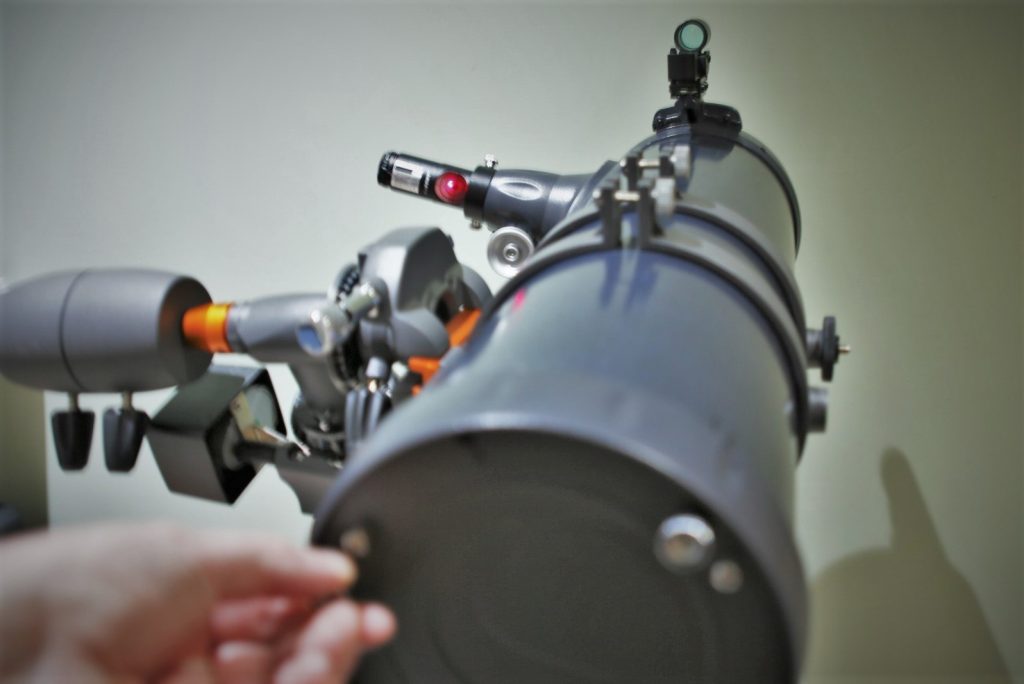
- Re-tighten the collimation locking screws
Next, gently tighten the primary mirror collimation locking screws. Continue checking the laser remains central on both the primary mirror and collimation tool target as you tighten – make minor adjustments to the thumbscrews and/or secondary mirror, if required.
Finishing up
Enjoy your freshly collimated telescope – it is worth performing a star test (“field collimation”) to help you further optimise your collimation.